How to Set Privacy and Access Controls on Your Flipbooks
With Paperturn, you have various versatile and customizable options to protect your online content and align with your business model. Each individual flipbook's privacy settings and access controls can be customized. Additionally, you can combine multiple privacy and access controls to create the perfect document management configuration for each flipbook!
We have four different Privacy and Access controls available.
Quick jumps:
How to Set Your Flipbook as Public or Private
Step 1:
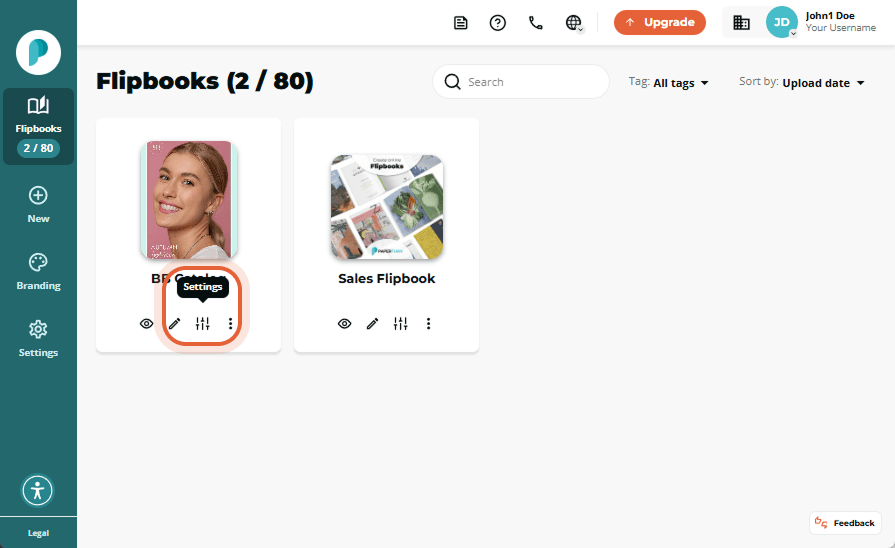
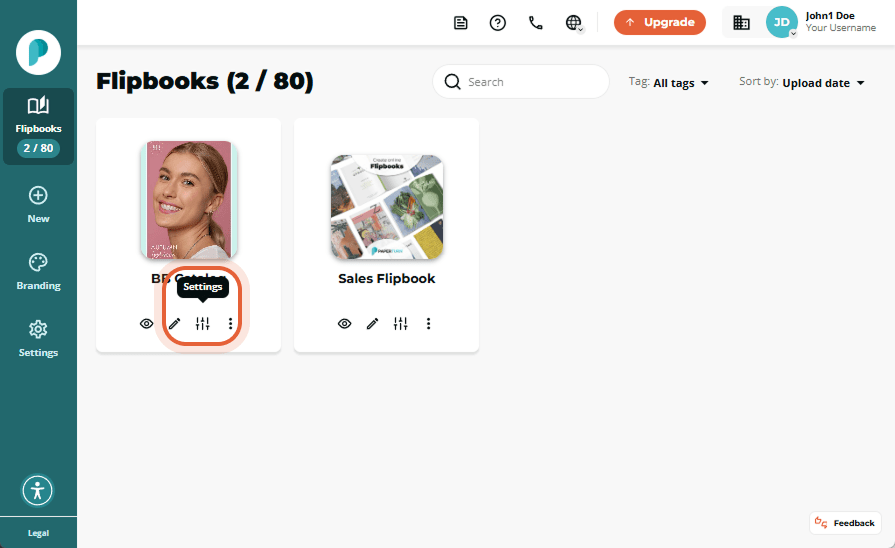
Select the flipbook you want to change the privacy settings for and click the Settings icon.
Step 2:
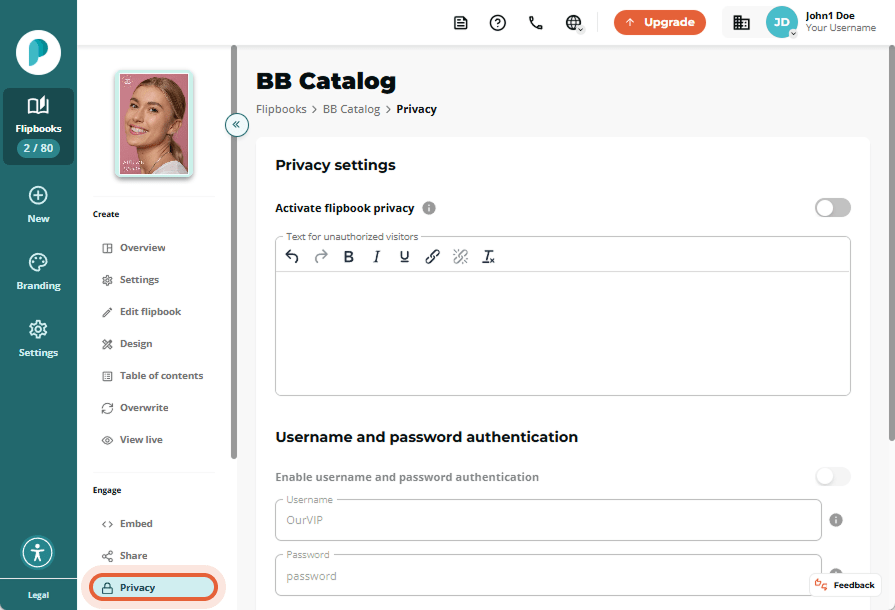
In Engage, select the Privacy tab.
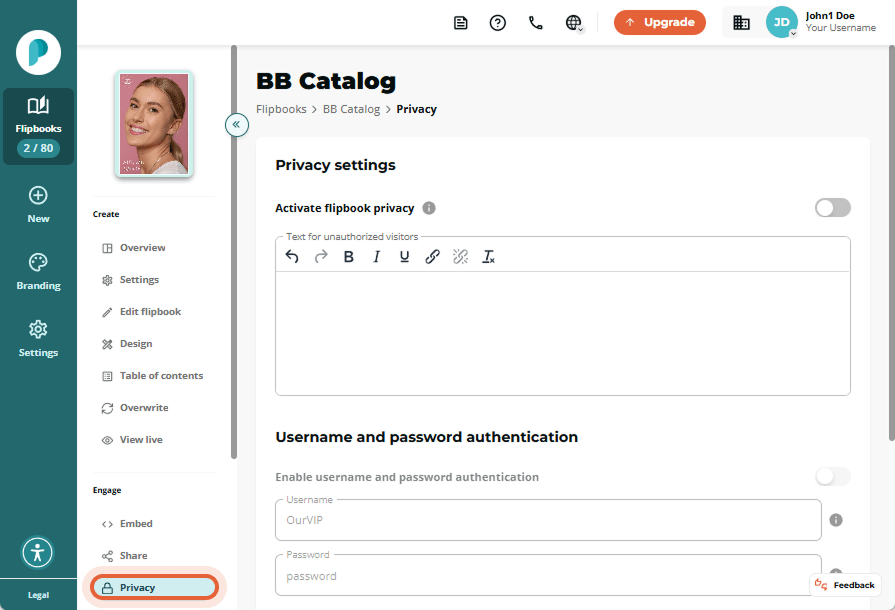
The default setting on your flipbook is always public. With a public setting, you can share your publications across all channels without viewer restrictions.
If you want to restrict access to your flipbook, such as when working on a draft or handling sensitive content, you can set it to private. When set to private, users who click the link will see a message that you can customize per flipbook.
Step 3:
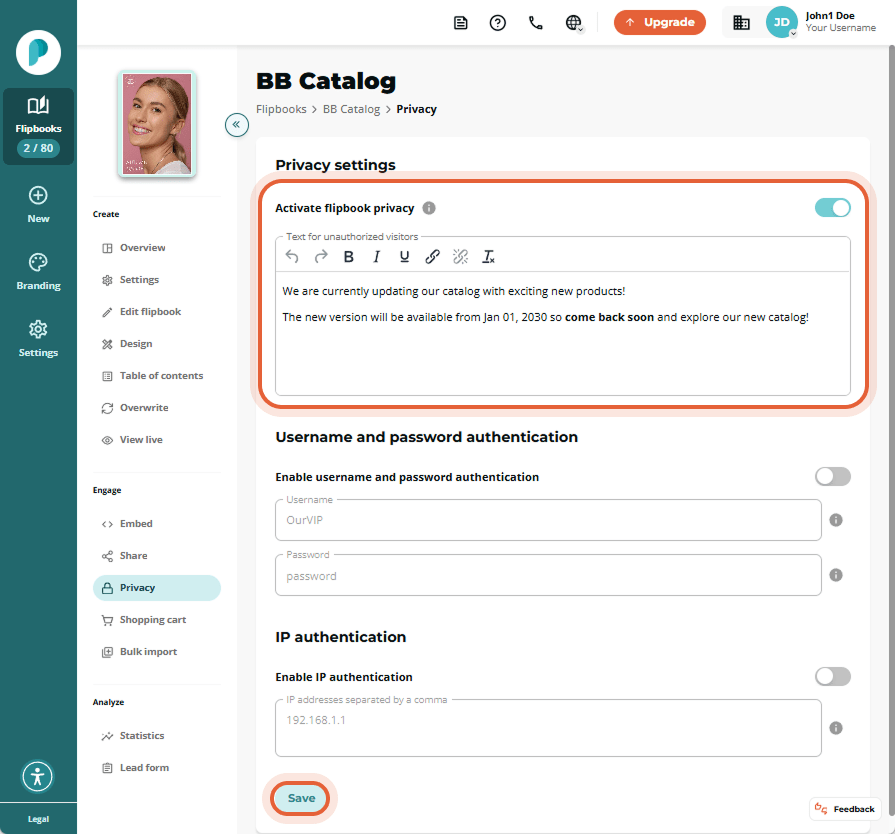
To set your flipbook to private, on the Privacy Settings card, toggle on Activate flipbook privacy.
Enter the message that will be displayed to readers when they click your flipbook link and are redirected to the privacy gate page in the Text for unauthorized visitors field, and click Save.
How to Password Protect Your Flipbook
When a flipbook is set to private, you have the additional option of protecting your flipbook with a password. Password-protected flipbooks can only be accessed by individuals who have received the username and password associated with the flipbook.
Step 1:
Select the flipbook you want to password protect and click the Settings icon.
Step 2:
In Engage, click the Privacy tab.
Step 3:
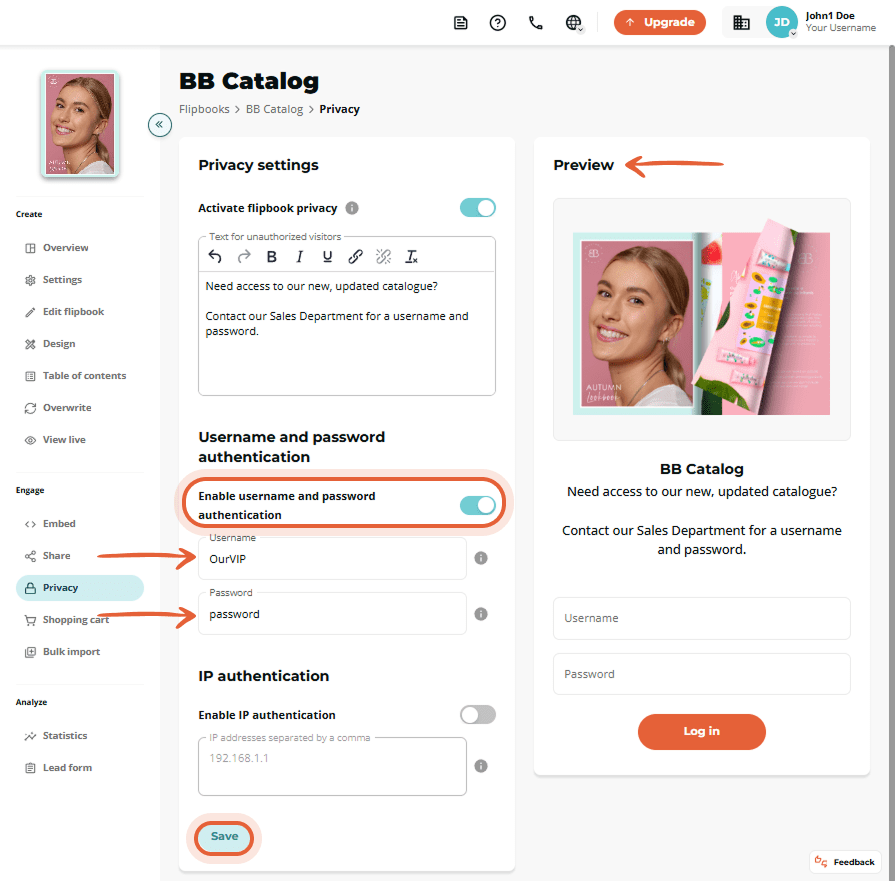
To set this up, toggle on Enable username and password authentication in the Privacy Settings card and select your desired username and password combination. You can also customize the text displayed on the page when users are prompted to enter the username and password by editing the text in the Text for unauthorized visitors field.
Currently, only one username and password can be created per publication.
Step 4:
A preview of what your readers will see is available on the right-hand side of your screen. Click Save to verify your desired changes, and your flipbook is now protected with the Username and Password.
How to enable IP-Whitelisting on your flipbook
IP whitelisting is ideal for sharing highly sensitive content with a select group of people within specific IP ranges. This solution is perfect for enterprises with internal documents or when selling your flipbook to a limited audience. IP-whitelisting ensures that only those with approved IP addresses can view your flipbook. You can combine IP whitelisting with password protection for an extra secure way to protect your online content.
Step 1:
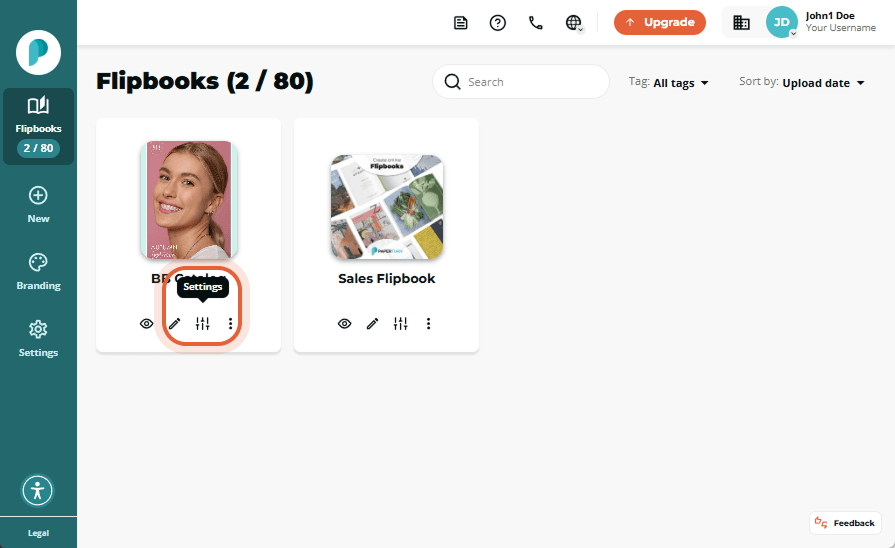
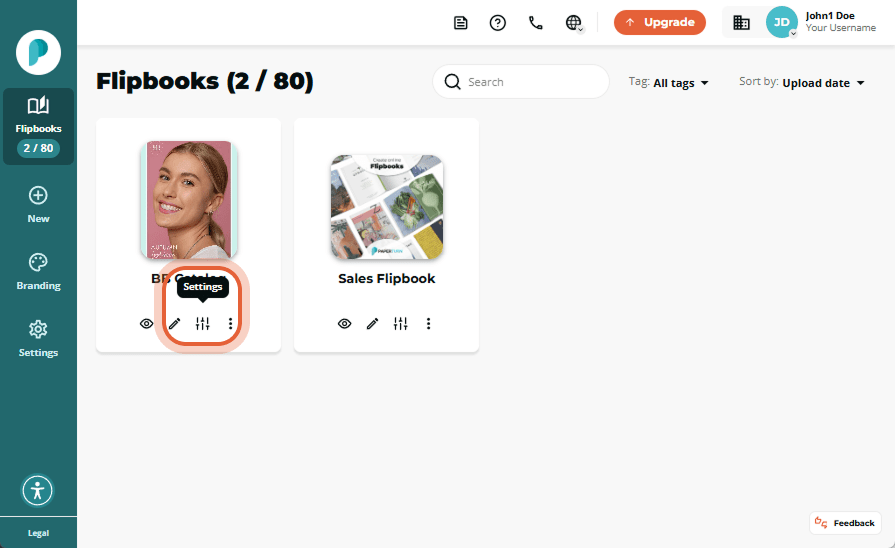
Select the flipbook you want to activate IP whitelisting for and click the Settings icon.
Step 2:
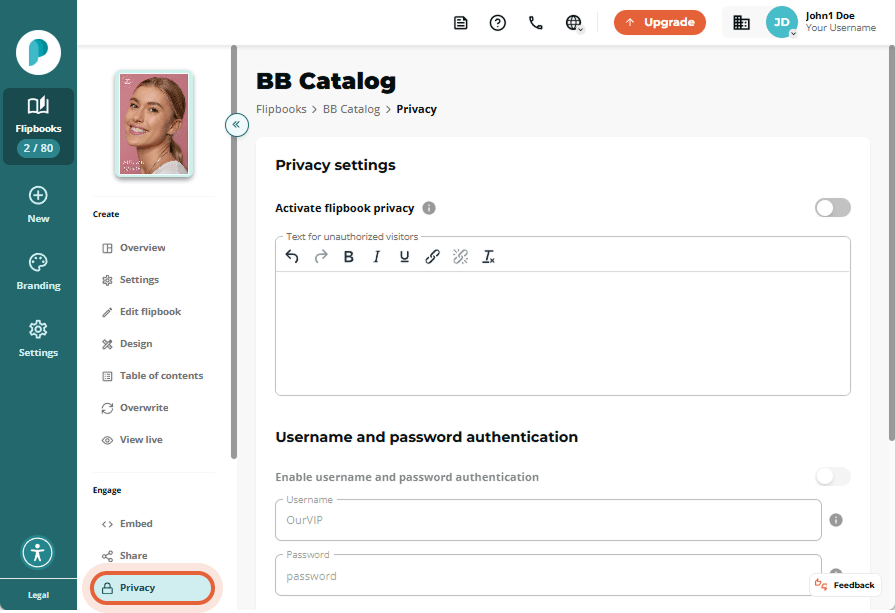
In Engage, open the Privacy tab.
Step 3:
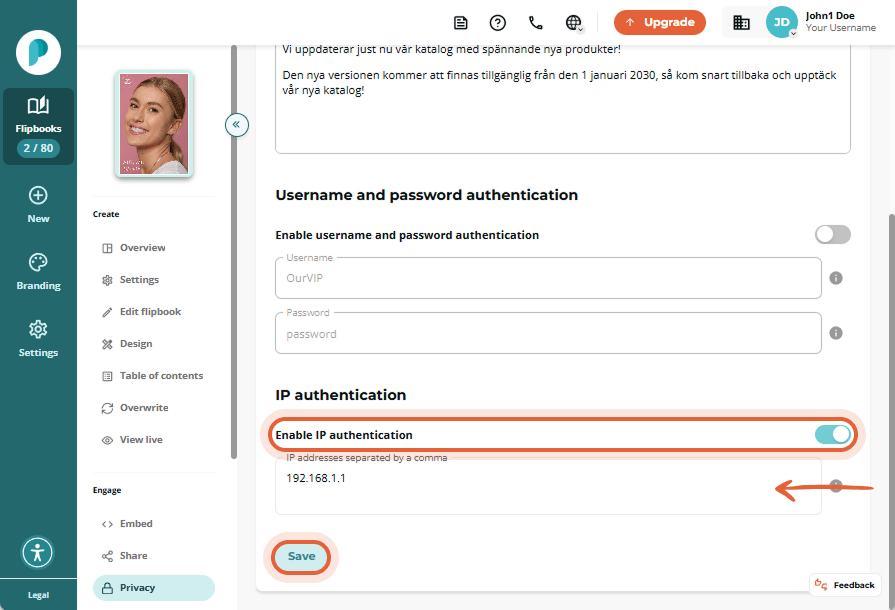
To enable IP whitelisting, turn on Enable IP authentication in the Privacy Settings card and enter the IP addresses that should have access to your content. You can enter specific IPs, wildcard ranges, and set ranges separated by commas. After clicking Save, only people using an IP address from your list will be able to access your flipbook.
Example:
83.200.100.120, 83.200.100.*, 83.200.100.100-120
Single IP address: 83.200.100.120 (only this IP will be whitelisted)
Wildcard IP addresses: 83.200.100.* (all IPs on this range will be whitelisted: 83.200.100.1 - 83.200.100.255)
Set IP ranges: 83.200.100.100-120 (Only IPs between 83.200.100.100 and 83.200.100.120 will be whitelisted)
Wildcards and ranges are allowed only in the last octet of a single IP address
Only IPv4 is currently supported
Note: Domains are not accepted. This feature is only for use with publicly visible IPs. For example 127.0.0.1 will not work.
How to Customize the Share, Print, Download and Search Engine Indexing Options
When your flipbook is set to public, it is easily accessible and shareable. However, you can customize several settings to suit your preferences while your flipbook is publicly accessible.
Step 1:
Select the flipbook you want to change the flipbook’s share settings for and click the Settings icon.
Step 2:
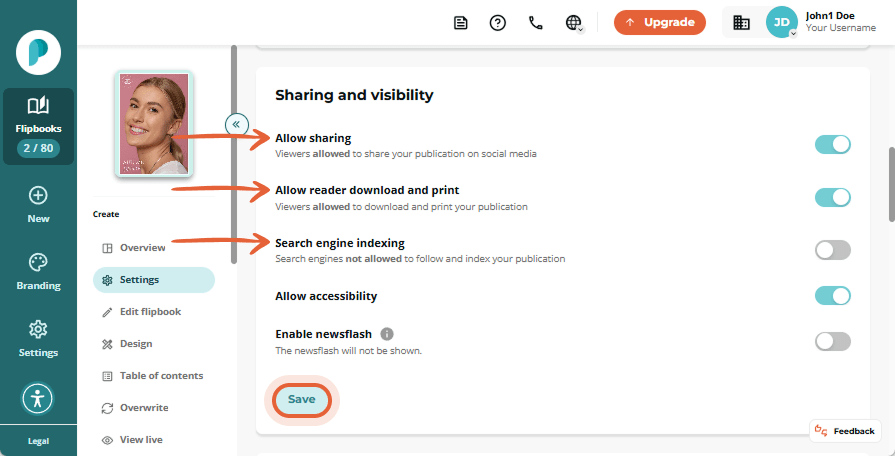
Click on Share and Visibility card, select the type of viewing and indexing permissions you wish to set on your flipbook.
For example:
- Choose whether readers can Share your flipbook
Choose whether readers can Download and Print your flipbook
Choose whether search engines like Google and Bing can Index your flipbooks
When you are finished adjusting your flipbook’s Share and Visibility settings, click Save to confirm your changes.
