How to Customize Your Flipbook Domain Name (URL)
With Paperturn Pro, you can assign a custom domain to each flipbook, giving you multiple unique URLs per account. Share flipbooks under your company’s domain instead of the default Paperturn URL, reinforcing your brand identity across all touchpoints.
Note: The CNAME feature is available only with a Pro subscription. It is not included in the free 14-day trial or the Basic plan. Set up requires access to your domain’s DNS records and advanced technical knowledge, so please have a qualified team member handle the configuration. Paperturn cannot provide support for third-party DNS or domain issues.
Example:
Your website is called: www.beautytools.com
You want to create a custom URL for your flipbook that shows the keyword catalog, so that your flipbook's URL would be catalog.beautytools.com.
How to Set Up Your Custom URL
Step 1:
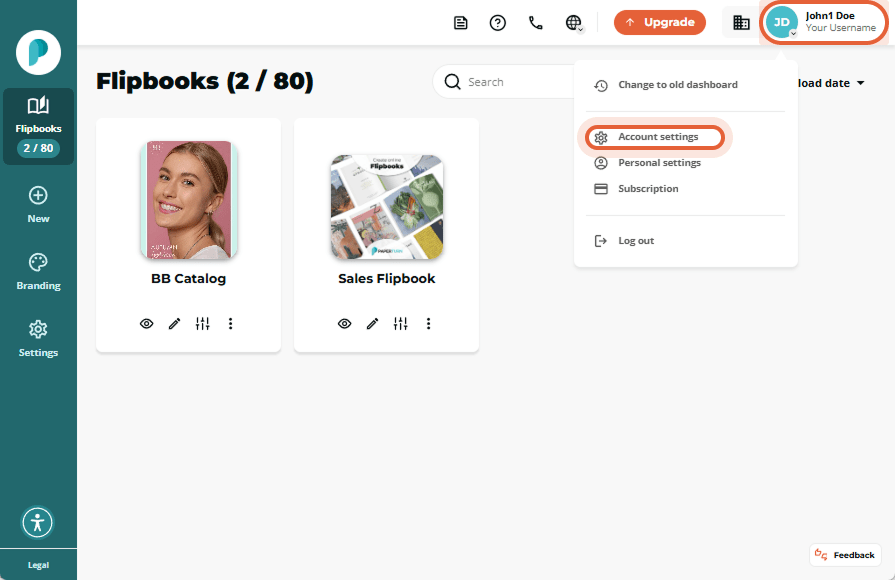
Click on the account dropdown menu in the top right-hand corner of your screen and select Account settings.
Step 2:
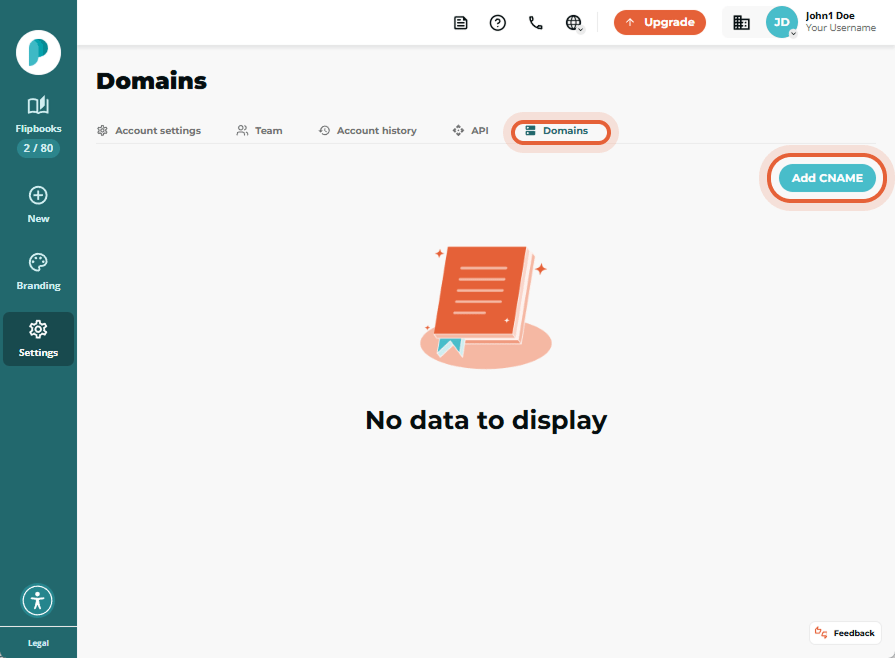
In the horizontal navigation bar, click Domains. Because a single custom domain can serve multiple flipbooks, add it to your account first. Click Add CNAME. You can then assign that domain to any flipbook in your account.
Step 3:
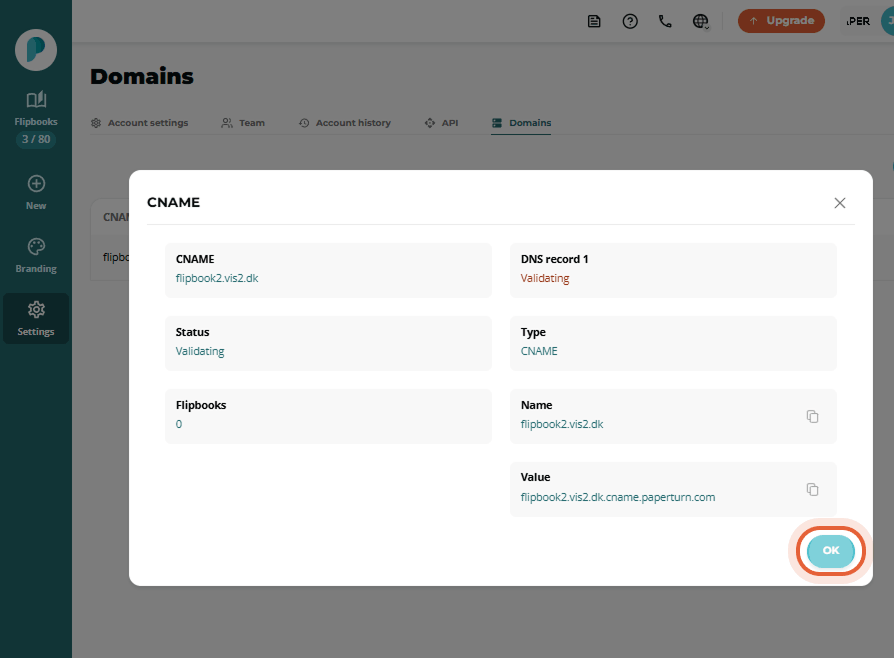
Our system will generate a DNS record for you to add to your domain name provider.
Create the record as a CNAME within your DNS platform, copying the Name and Value exactly as shown, into their respective input fields within the new records you are creating. If the provider asks for a TTL, leave it blank or use the default.
Note: DNS providers have slight variations on Name and Value input fields. Please consult their technical guides if there are variations present.
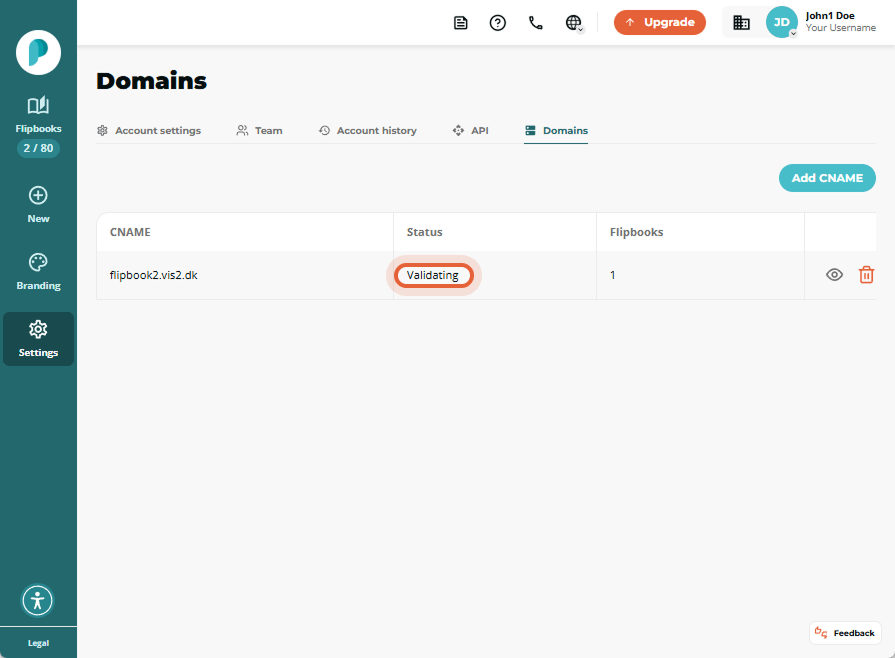
Note: It can take between 1 minute to 12 hours before the changes from your DNS host are active. This depends entirely on your DNS host and not on Paperturn. However, while your CNAME is validating, your flipbook will still be active and available for people to view with the original link.
Step 4:
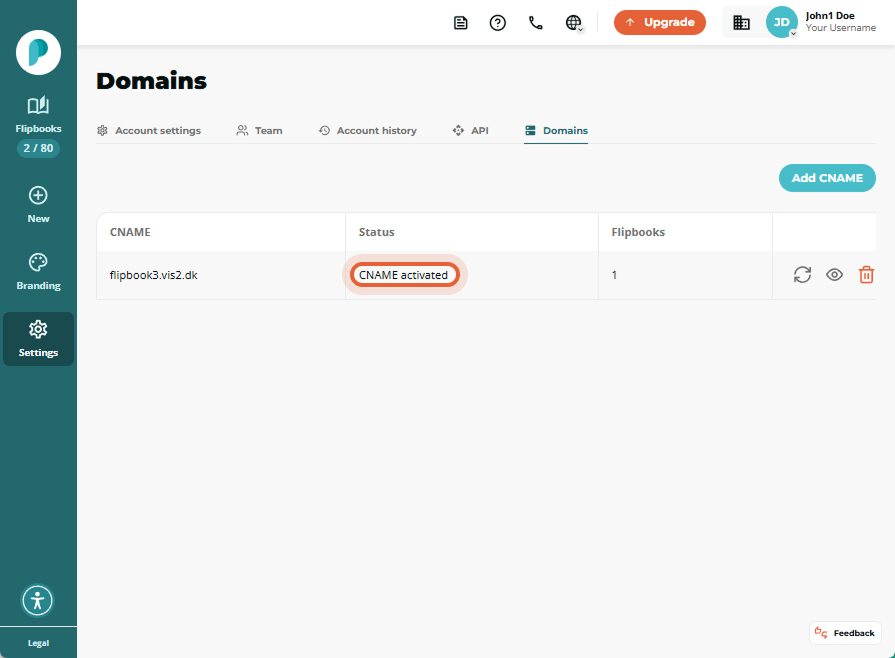
Once your CNAME is activated and accepted, you will see confirmation within the Status field. Now you need to choose which flipbook to use the CNAME with.
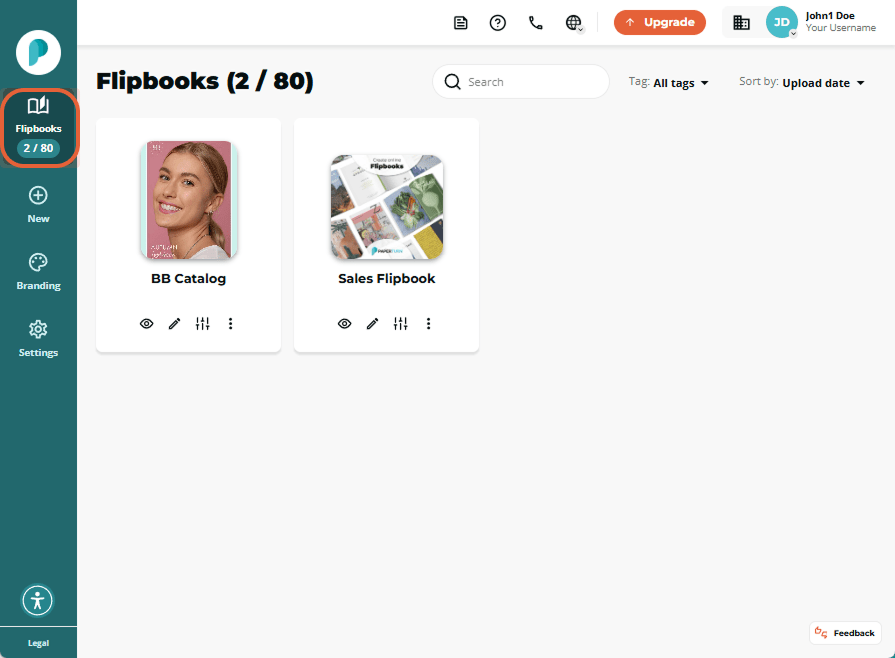
Return to your flipbook overview by clicking the Flipbooks icon on the main sidebar.
Step 5:
Select the flipbook you want to assign with the new domain, then click the Settings icon.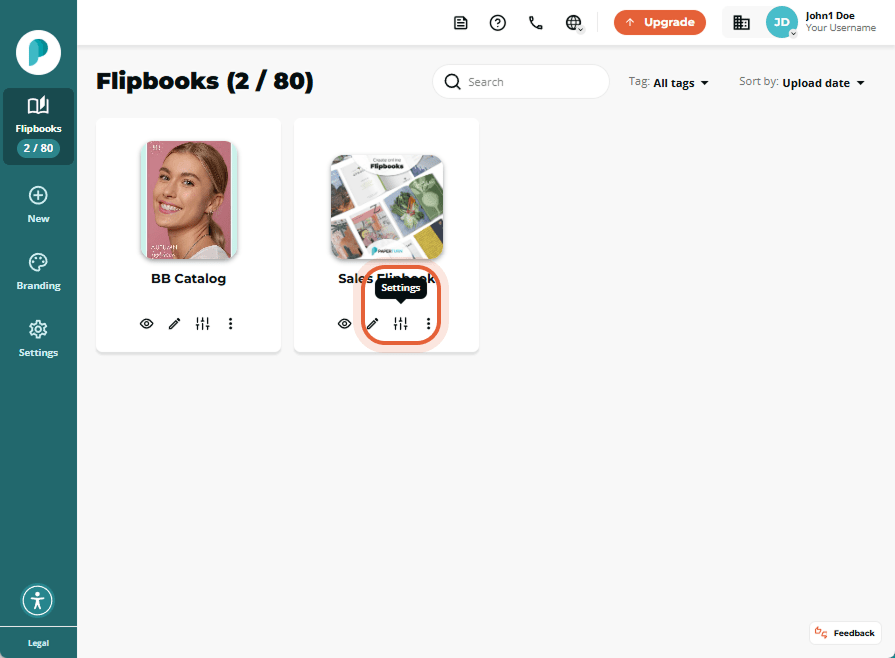
Step 6
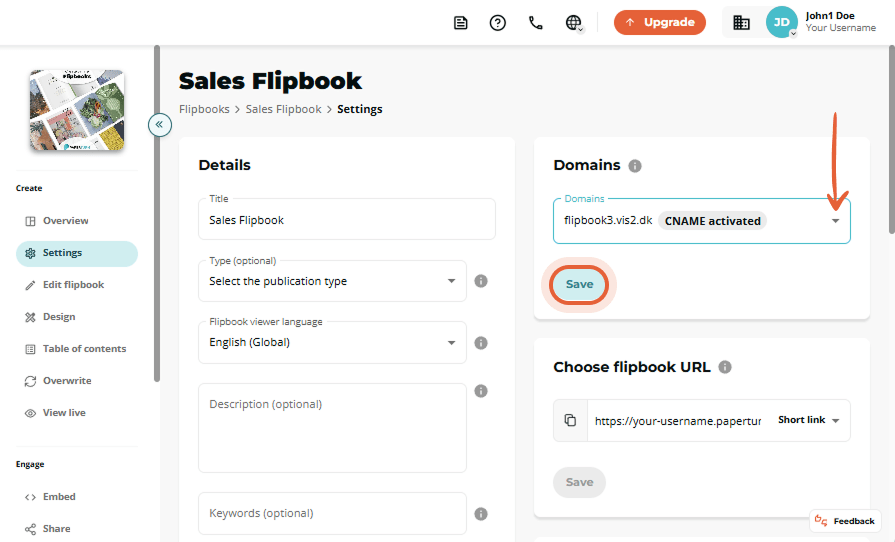
Here you can see the Domains and Choose Flipbook URL cards.
These two settings will effect your flipbook URL customization.
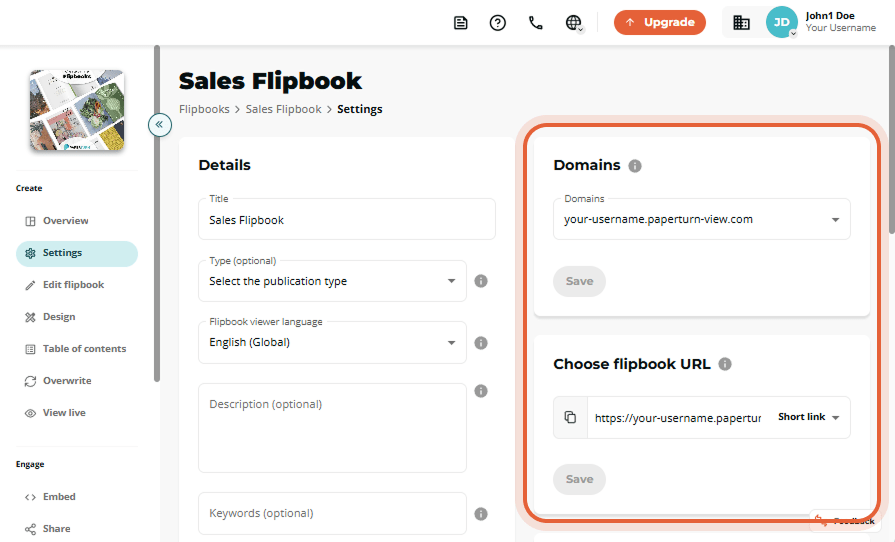
Open the Domains dropdown, select the domain you added, and click Save.
Step 7:
Finally, open the Link dropdown, select one of the three URL options for this flipbook, and click Save.
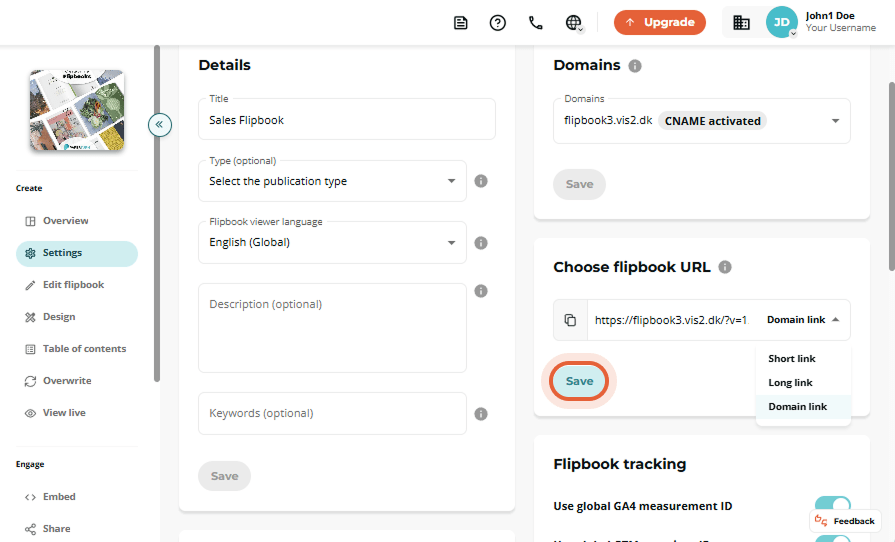
Short link contains your CNAME and the flipbook identification number.
Long link is the long URL, often used for SEO purposes. It contains the CNAME, the title of the flipbook, and the flipbook identification number.
Domain link is just the CNAME. This is the most popular option when a CNAME is enabled, as it is the easiest link for your readers to remember and type into the URL field.
Note: Although you can have the same CNAME across multiple flipbooks, only one flipbook can display the Domain link. Otherwise, we would be unable to distinguish which flipbook to direct your audience to. For other flipbooks using the same domain, we suggest using the Long link, as it will include your publication title within the link for easy identification.