How to Add a Table of Contents to a Flipbook
Adding a table of contents to a flipbook provides readers with a clear outline of its content and structure. It makes navigation quick and easy - readers can click on an entry and go straight to the related page. This is especially handy for larger flipbooks with numerous pages!
Step 1:
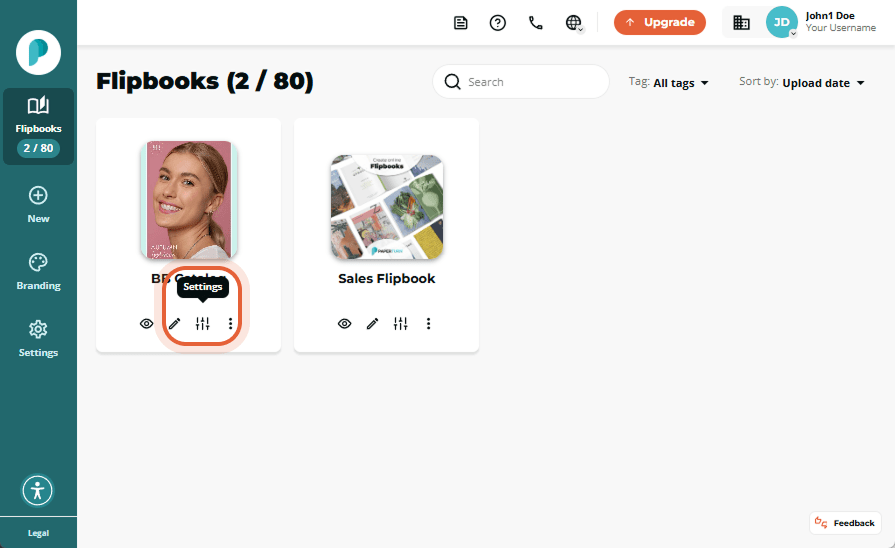
Select the flipbook you want to add a Table of Contents to and click Settings.

Step 2:
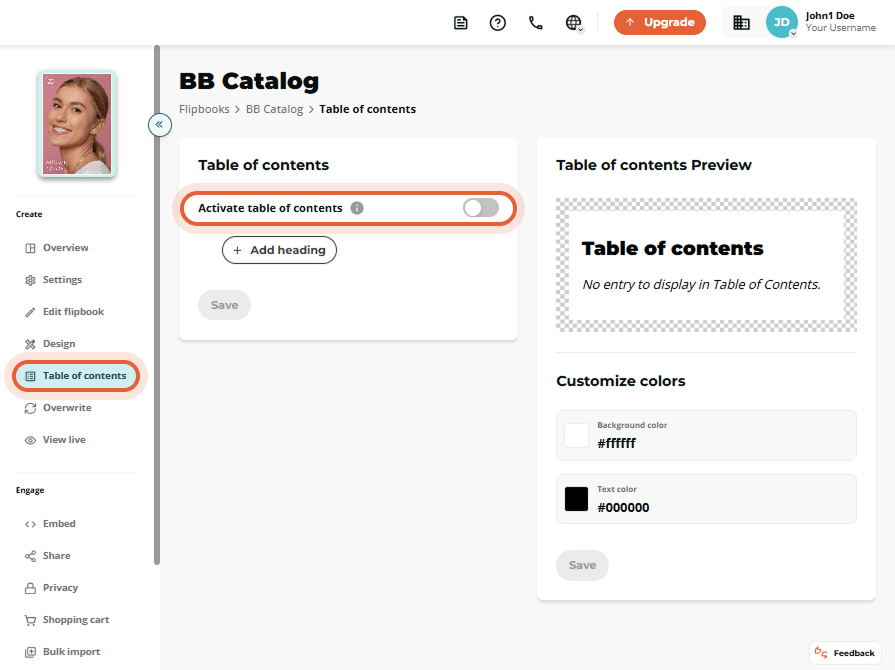
In Create, click the Table of Contents tab. On the Table of Contents card, toggle on Activate Table of Contents.

Step 3:
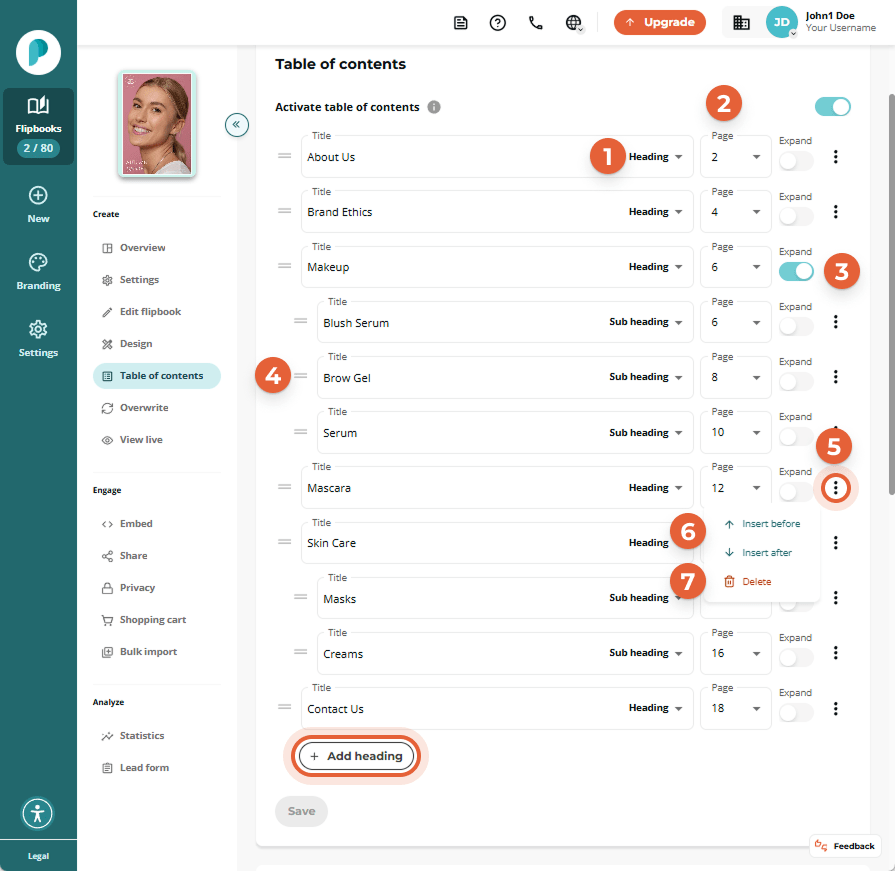
To populate your Table of Contents, click on the + Add heading button.
For each entry, provide its title, format (heading, subheading, or subheading2), and the page number it corresponds to. You can rearrange entries by dragging them up or down using the horizontal lines next to their titles. To remove entries, click the red trash can icon next to each title.
You can also choose whether you want a section of your Table of Contents to show as expanded or collasped by toggling the Expand option.

Step 4:
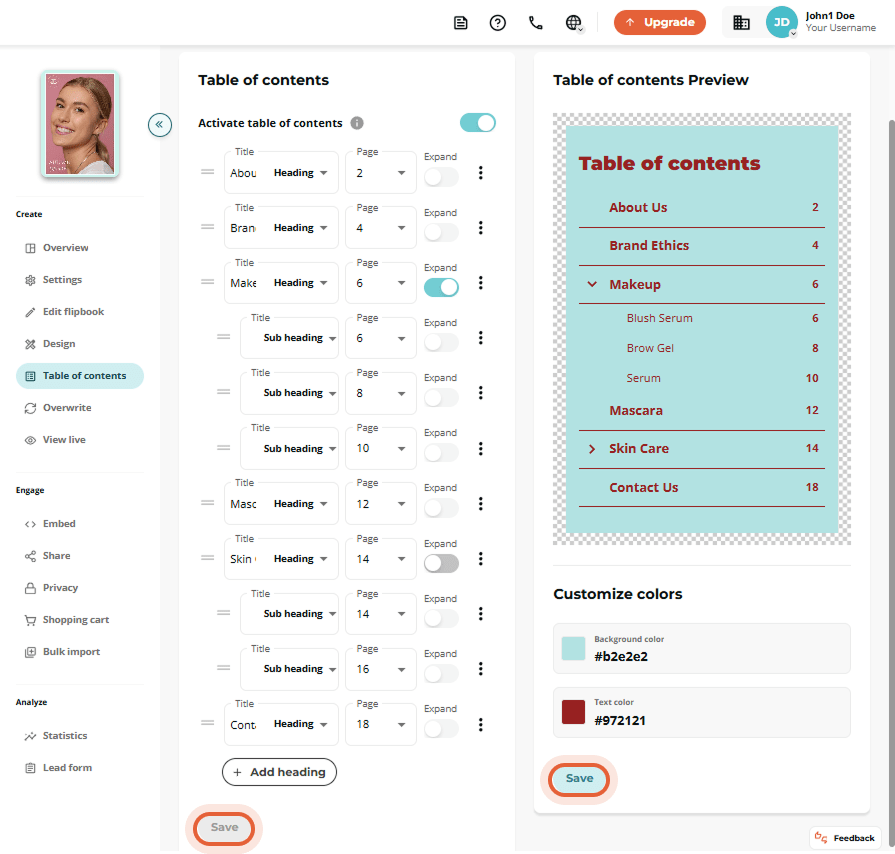
In the Table of Contents Preview card, set the background and text colors using HEX codes. The preview updates in real time as you adjust them.When you are finished, click Save on every card to apply your changes.

Click on the flipbook below to see this feature in action.