How to Add a Shopping Cart to Your Catalog
The shopping cart integration is invaluable for manufacturers, wholesalers, retailers, and service providers looking to sell products directly from their catalogs. With Paperturn's shopping cart feature, customers - both B2B and B2C - can add products directly from the catalog to their cart and conveniently send the order as a purchase order via email, streamlining the selling process.
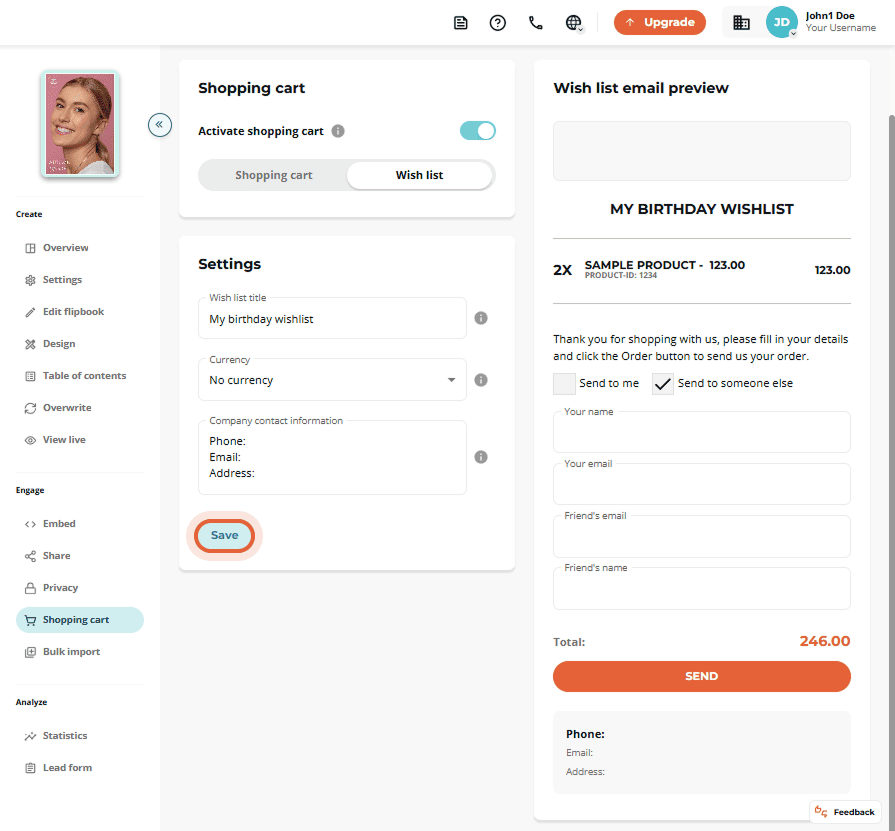
The shopping cart can also serve as a wish list. Customers can add their desired products or services and then email their wish list to any person or company they choose.
Our Shopping Cart Options
Quick jumps:
How to Add a Shopping Cart to Your Catalog
Step 1:
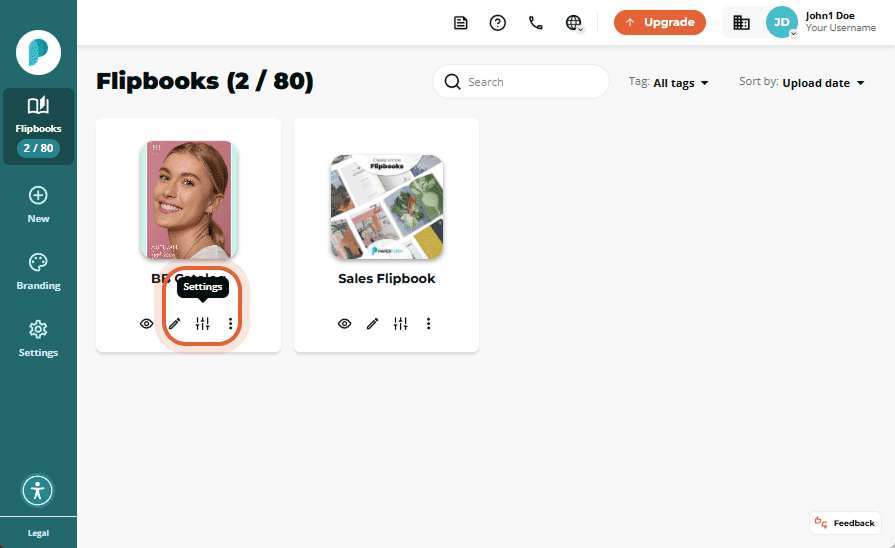
Select the flipbook you want to add a shopping cart to, then click the Settings icon.
Step 2:
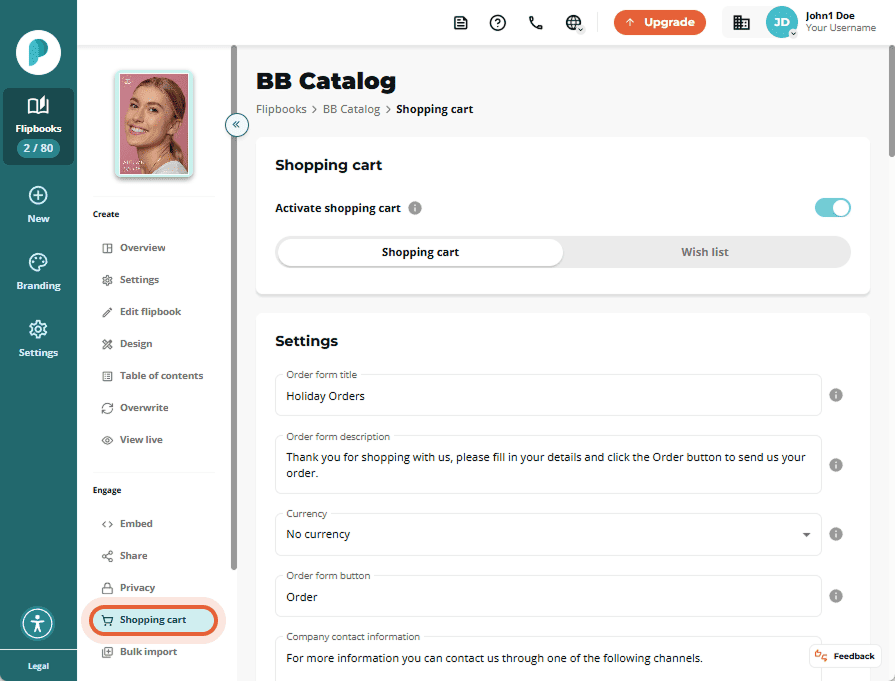
In Engage, click the Shopping Cart tab.
Step 3:
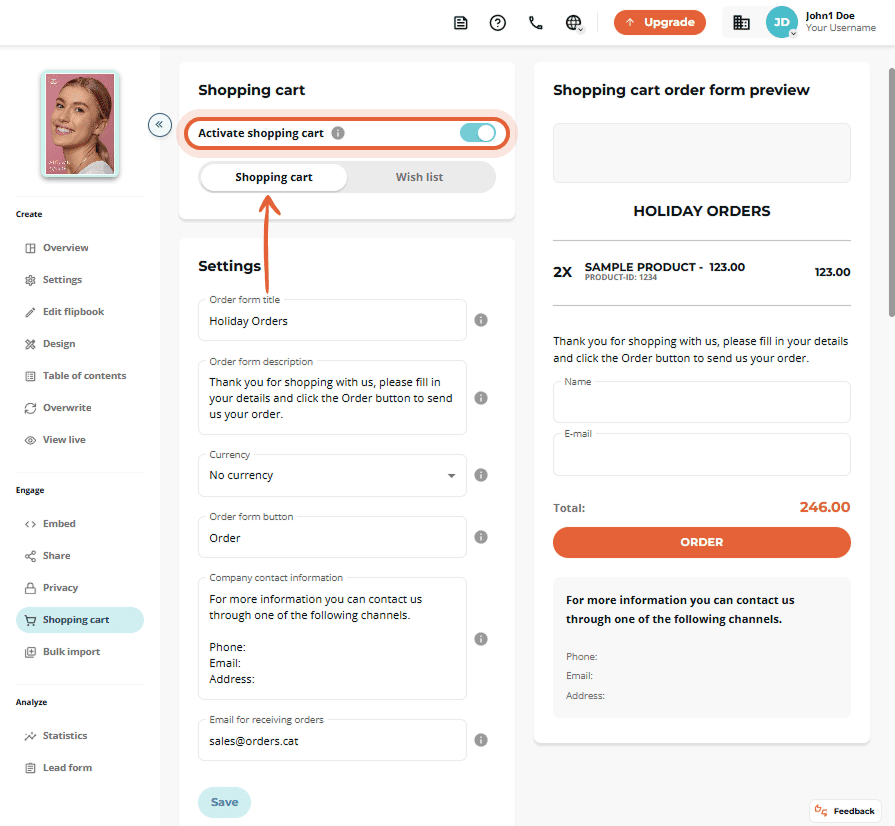
On the Shopping Cart card, toggle Activate Shopping Cart to enable the shopping cart on your catalog. Make sure the setting is set to Shopping Cart and not Wish List once activated.
Step 4:
Now you can set up the shopping cart in your flipbook. Customize the settings, order form fields, discount codes, order confirmation message, and order confirmation email to suit your needs.
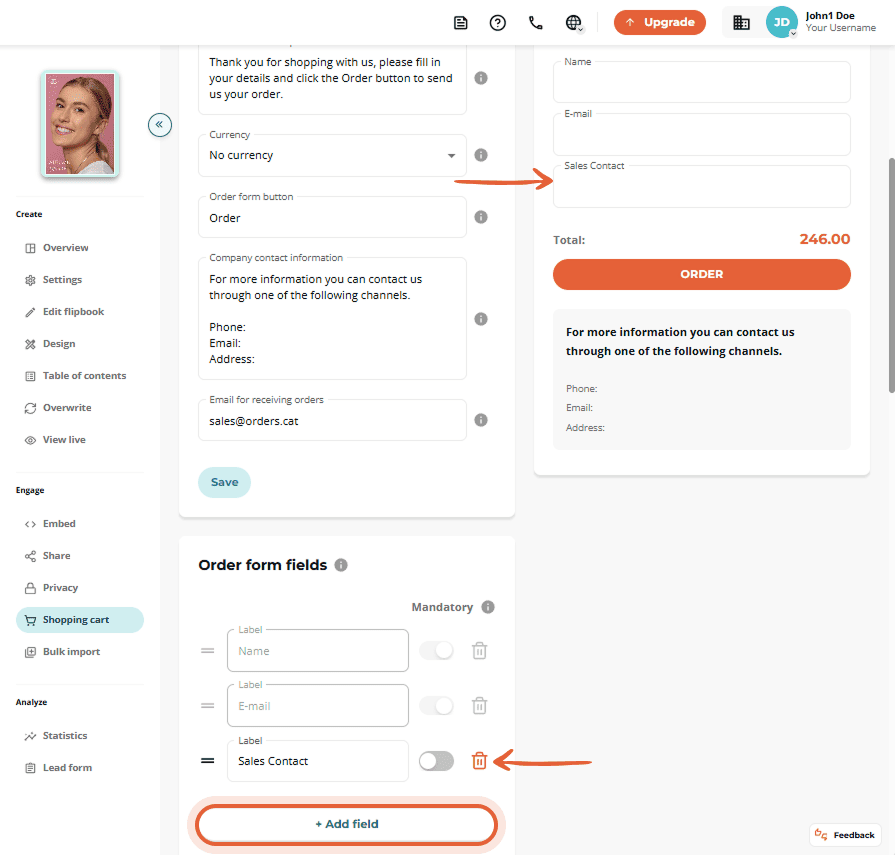
- Customize Settings: In this section, you can choose the shopping cart's currency, update the title, description, buttons, and company information displayed on the order form, and specify the email address for receiving orders.
- Customize Order Form Fields: These are the fields your customers fill out when completing their shopping cart order. Name and email are mandatory fields, however, you can add up to 8 additional fields to fit your company's needs.
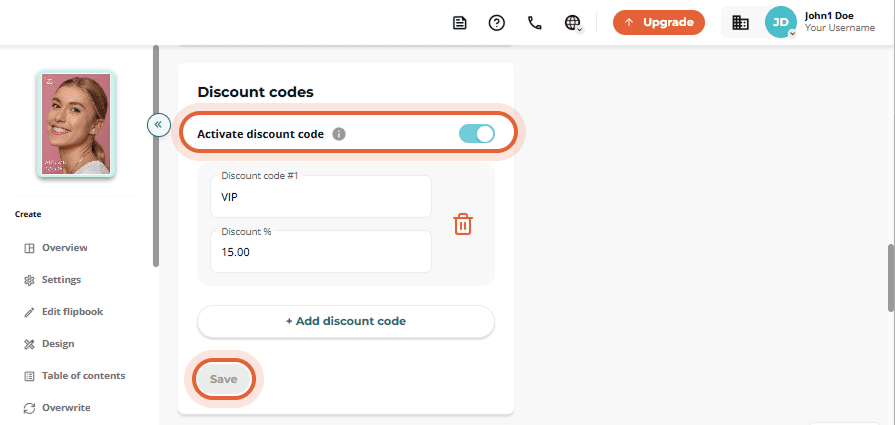
- Customize Discount Codes: If activated, customers can apply discount codes at checkout to reduce their order total. You can have up to 2 discount codes active at a time.
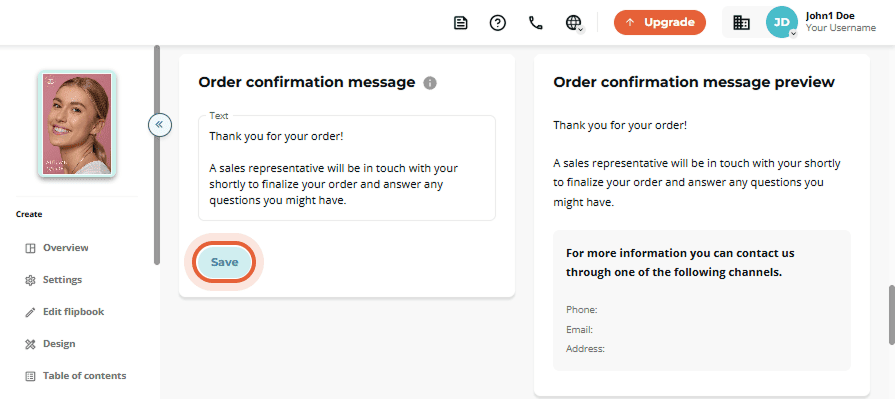
- Customize Order Confirmation Message: Here, you can customize the on-screen message that customers will see immediately after placing an order, along with a preview. Always remember to click Save after any change on a card.
- Customize Order Confirmation Email: From this card, you can customize the email your customers will receive after placing an order.
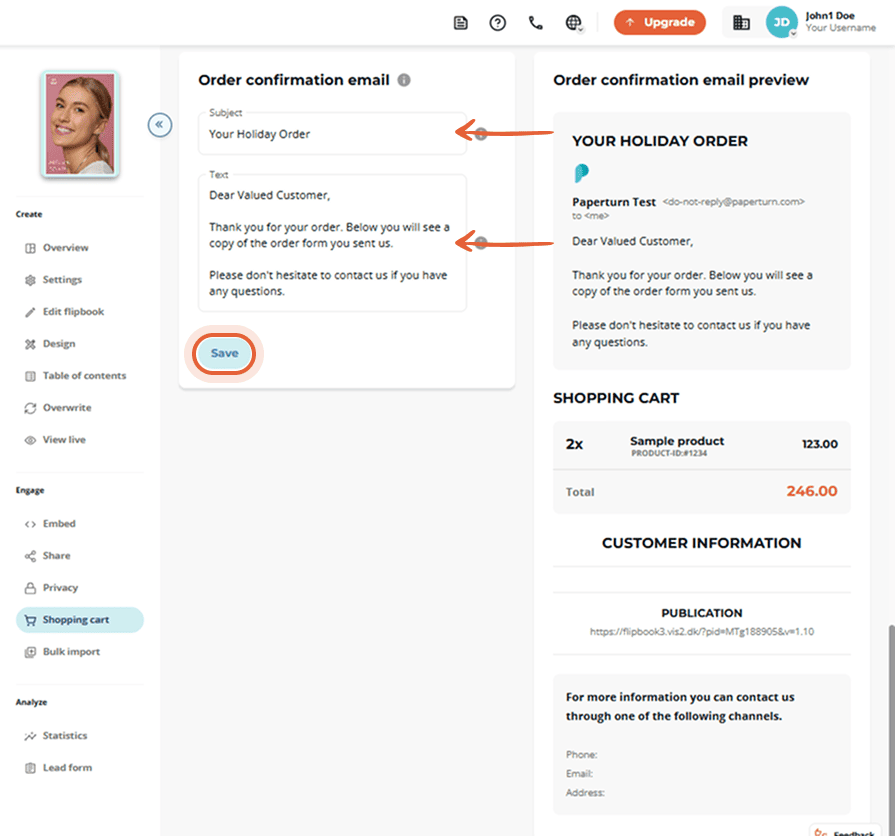
Always click Save after customizing each section. The preview section(s) allow you to see real-time updates of your order form, order confirmation message, and email as you make changes.
How to Add Product Links to a Catalog
After activating and customizing your shopping cart settings, it is time to add clickable product links to your flipbook. These links allow you to set prices and descriptions for your products, enabling users to click and add items to their shopping cart.
Step 1:
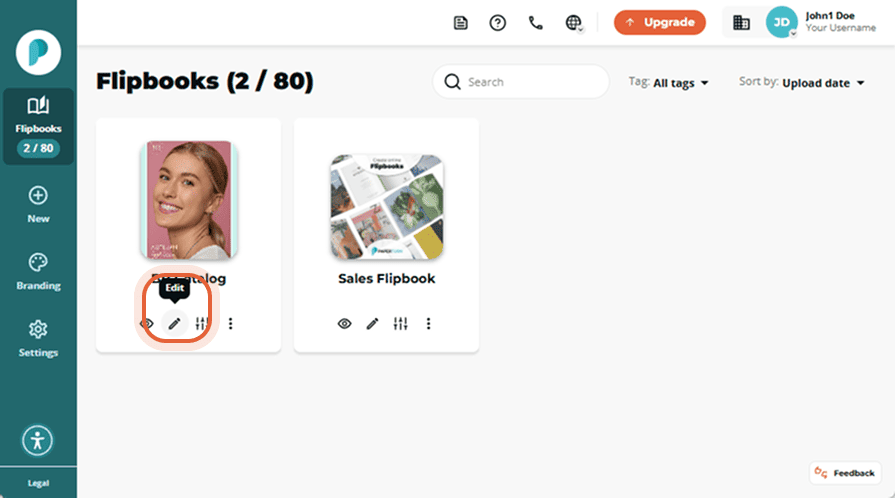
Find the flipbook with the shopping cart enabled, click the Edit icon.
Step 2:
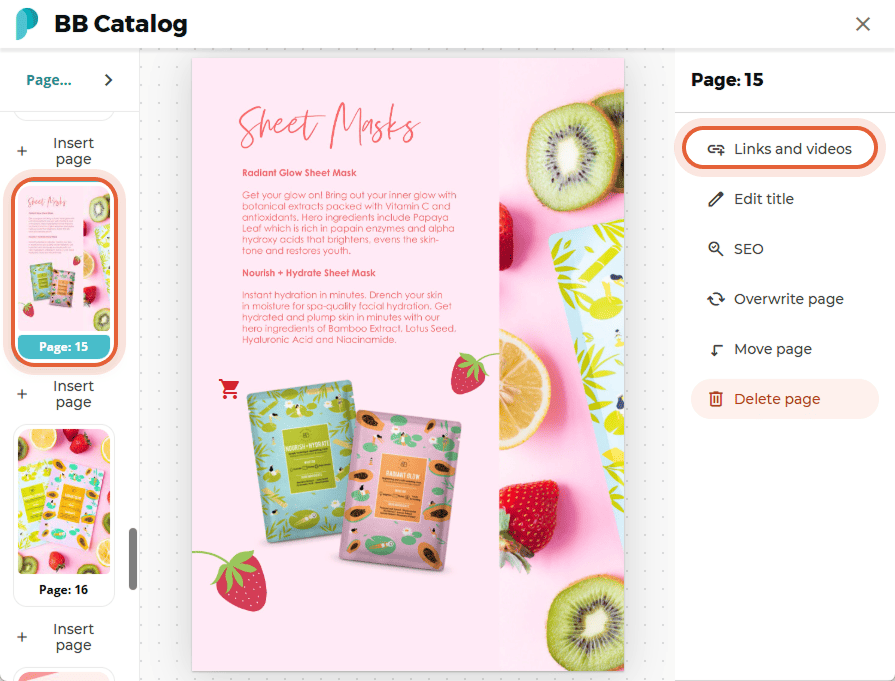
From the Page Navigation on the left-hand side of the screen, select the page you want to add product links to and click Links and videos.
Step 3:
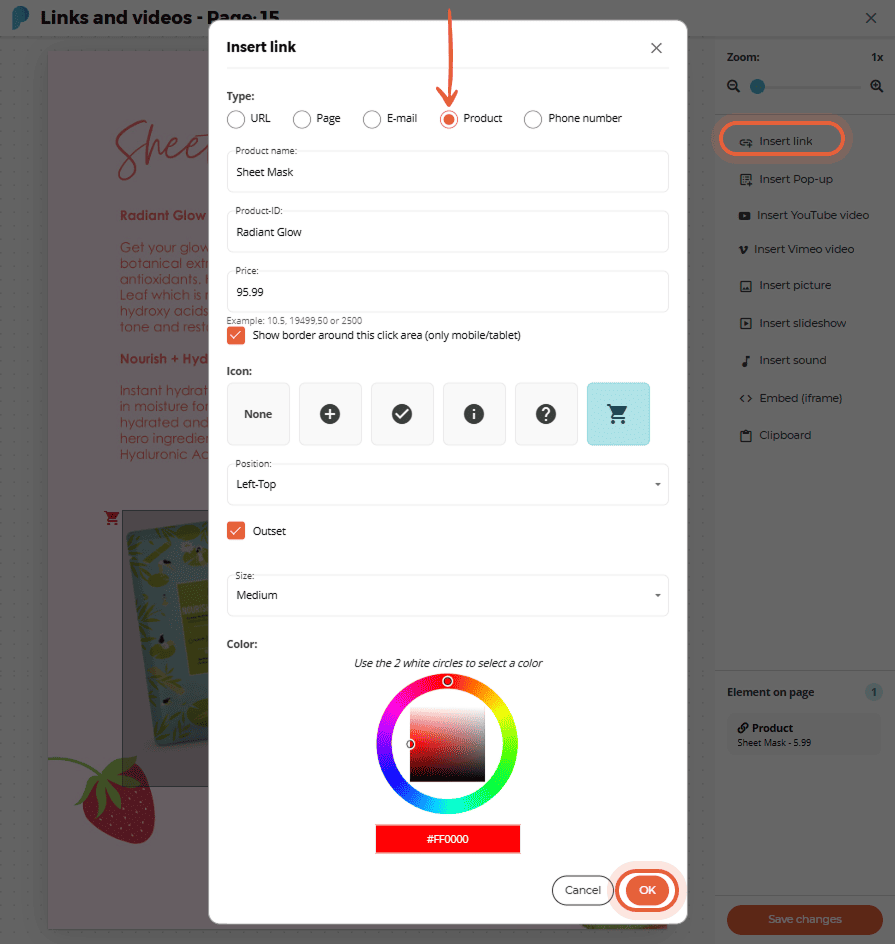
Click Insert link and select the Product option.
Enter the product name, product ID (if relevant), price, and choose whether to include an icon with your shoppable link. Click OK to add the product link to the page.
Step 4:
Move and scale the link area to the preferred size and position. Finish by clicking the Save changes button in the right-hand menu.

Congratulations! You have added your first product link. This process needs to be repeated for all of the shoppable products in your catalog.
If your catalog contains many shoppable product links, we recommend using the bulk link import feature to quickly add hundreds of links to your flipbook at once.
How to Enable a Wish List on a Catalog
The wish list provides an alternative to the shopping cart by allowing customers to compile items they are interested in without making an immediate purchase. At checkout, they can email their wish list to anyone they choose, such as friends, family, or colleagues. This feature is perfect for gift and wedding registries, as well as for gauging interest before a product launch.
Step 1:
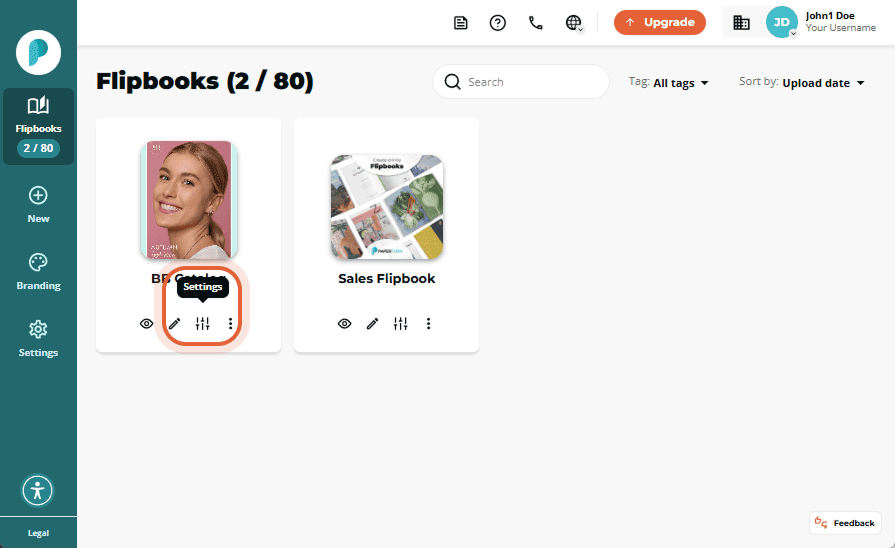
Select the flipbook you want to add a wish list to, then click the Settings icon.
Step 2:
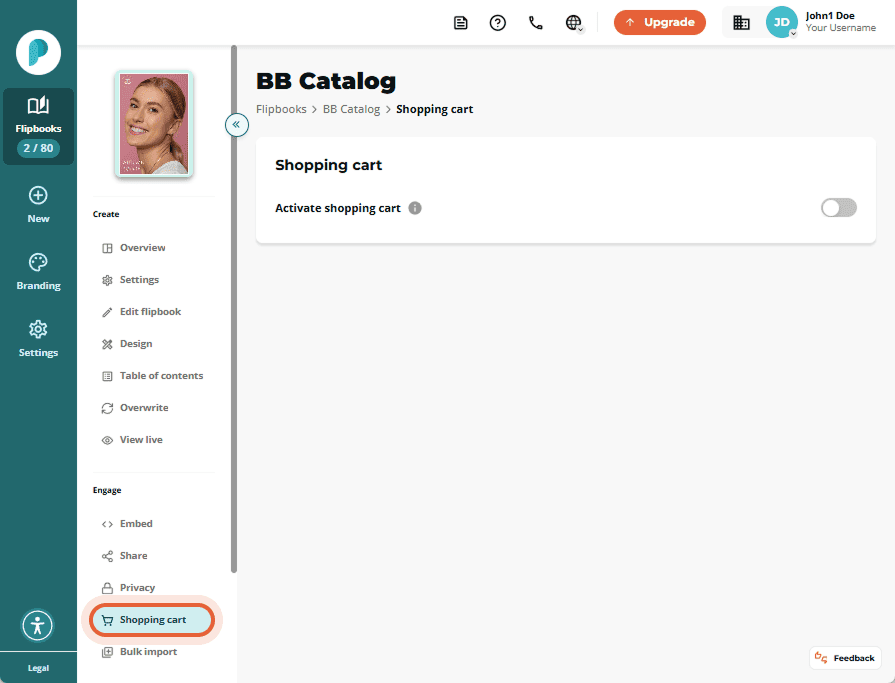
In Engage, click the Shopping Cart tab.
Step 3:
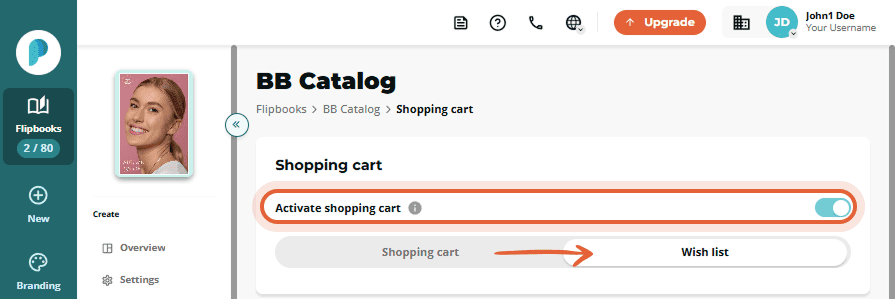
On the Shopping Cart card, toggle Activate Shopping Cart and then make sure the setting is set to Wish List and not Shopping Cart once activated.
Step 4:
Now we can customize the wish list. You need to customize the shopping cart's settings, order form fields, discount code(s), order confirmation message, and order confirmation email.
Click Save after making any changes. The preview sections allow you to see real-time updates of your order form, order confirmation message, and email as you make changes.
